Table of Contents
- Why Seawall Inspection Matters for Waterfront Property Owners
- Visible Cracks, Gaps, and Deterioration: Early Warning Signs of Seawall Failure
- Leaning, Bulging, and Bowing: Movement That Signals Structural Compromise
- Soil Erosion Behind Seawall: A Hidden Threat to Foundation Stability
- Water Seepage, Leaks, and Drainage Problems
- How to Conduct a Seawall Inspection: Step-by-Step Homeowner Checklist
- Seawall Repair Options and When Professional Assessment Is Critical
- Frequently Asked Questions
Last Updated: October 18, 2026
Why Seawall Inspection Matters for Waterfront Property Owners
A seawall protects your waterfront investment from erosion, storm surge, and water damage. But seawalls don’t last forever.
Understanding the warning signs of seawall structural failure is the first step to protecting your investment.
This guide walks you through the visible indicators of trouble, how to inspect your seawall safely, and when to call a professional. We’ll help you distinguish normal wear from serious structural problems so you can act before minor issues become major expenses.
Visible Cracks, Gaps, and Deterioration: Early Warning Signs of Seawall Failure
Cracks and gaps are the most obvious red flags for seawall structural failure. But not all cracks mean your seawall is failing. The key is learning which ones matter and which ones don’t.
Hairline cracks versus structural cracks
Small hairline cracks in concrete are common and usually harmless. They happen naturally as concrete cures and responds to temperature changes. You’ll see them in most seawalls that are more than a few years old.
Structural cracks are different. These are wider, deeper, and often grow over time. Look for:
- Cracks wider than 1/8 inch (visible without close inspection)
- Cracks that run horizontally across the wall (not random)
- Cracks that connect to each other, forming patterns
- Cracks that leak water or show staining around them
Horizontal cracks are especially concerning. They often signal that soil pressure behind the wall is pushing outward. This is a serious sign of seawall structural failure that requires professional assessment.
Spalling and concrete deterioration
Spalling is when chunks of concrete flake off or break away from the surface. This happens when saltwater penetrates the concrete and corrodes the steel reinforcement inside. As the steel expands, it pushes the concrete outward until pieces break loose.
Signs of spalling include:
- Pitting or pockmarking on the concrete surface
- Chunks missing from the wall face
- Exposed rebar (the steel reinforcement bars)
- Rust stains running down the wall below damaged areas
- A rough, crumbling texture where the concrete was smooth
Spalling accelerates over time. Small damaged areas grow larger as more concrete breaks away. If you see spalling, document it with photos and measurements. This is a clear indicator that your seawall needs professional attention soon.
Leaning, Bulging, and Bowing: Movement That Signals Structural Compromise
Seawalls should be vertical. Any visible lean, bulge, or bow in the wall face is a warning sign of seawall structural failure.
Leaning means the wall is tilting away from vertical.
Bulging appears as a swelling or outward curve in the wall.
Bowing is similar to bulging but usually describes a longer, gentler curve rather than a localized swell.
Stand back from your seawall and look at it from different angles.
Soil Erosion Behind Seawall: A Hidden Threat to Foundation Stability
Soil loss behind your seawall is invisible from your yard but extremely serious. Water seeping through the wall carries fine soil particles away, leaving voids and weak spots. This undermines the wall’s support and causes it to settle or fail.
Sinkholes and ground depressions near the wall
Sinkholes are the most dramatic sign of soil loss. These are sudden depressions or collapse areas in the ground behind your seawall.
Watch for:
- Circular or oval depressions in your lawn near the wall
- Areas where the ground suddenly drops 2-6 inches
- Soft or spongy ground that feels unstable underfoot
- New depressions appearing after heavy rain or high tides
Sinkholes mean soil has been washed away and is no longer supporting the seawall. Do not ignore these. Call a professional immediately.
Ground depressions are less dramatic than sinkholes but still concerning. These are gradual low spots that develop over months. They indicate ongoing soil loss and erosion behind the wall.
Washed-out areas and soil loss indicators
Look along the base of your seawall where it meets the water. If you see exposed soil, gaps between the wall and the ground, or areas where the wall appears to be settling into the earth, soil has been washed away.
Other signs of soil loss include:
- Visible gaps between the wall cap and the wall face
- Areas where landscaping or pavers have cracked or shifted
- Exposed foundation or pilings where soil used to cover them
- Muddy water or sediment clouds near the wall base during high tides
These signs show that water is moving soil away from the seawall. This process weakens the foundation and accelerates seawall structural failure. The sooner you address it, the better.
Water Seepage, Leaks, and Drainage Problems
Water moving through or behind your seawall is a major concern.
Look for water actively leaking from the wall face. This might appear as:
- A steady drip or stream of water from a crack or joint
- Wet patches on the wall that stay wet even in dry weather
- Water pooling at the base of the wall
- Discolored areas showing where water regularly flows
Standing water behind your seawall is equally serious. This creates hydrostatic pressure (water pressure pushing outward) that stresses the wall structure.
Check your property after rain or high tides.
Poor drainage often leads to other problems. Water pressure builds up, pushing the wall outward. Soil behind the wall becomes saturated and loses strength.
How to Conduct a Seawall Inspection: Step-by-Step Homeowner Checklist
You don’t need special training to spot obvious problems with your seawall.
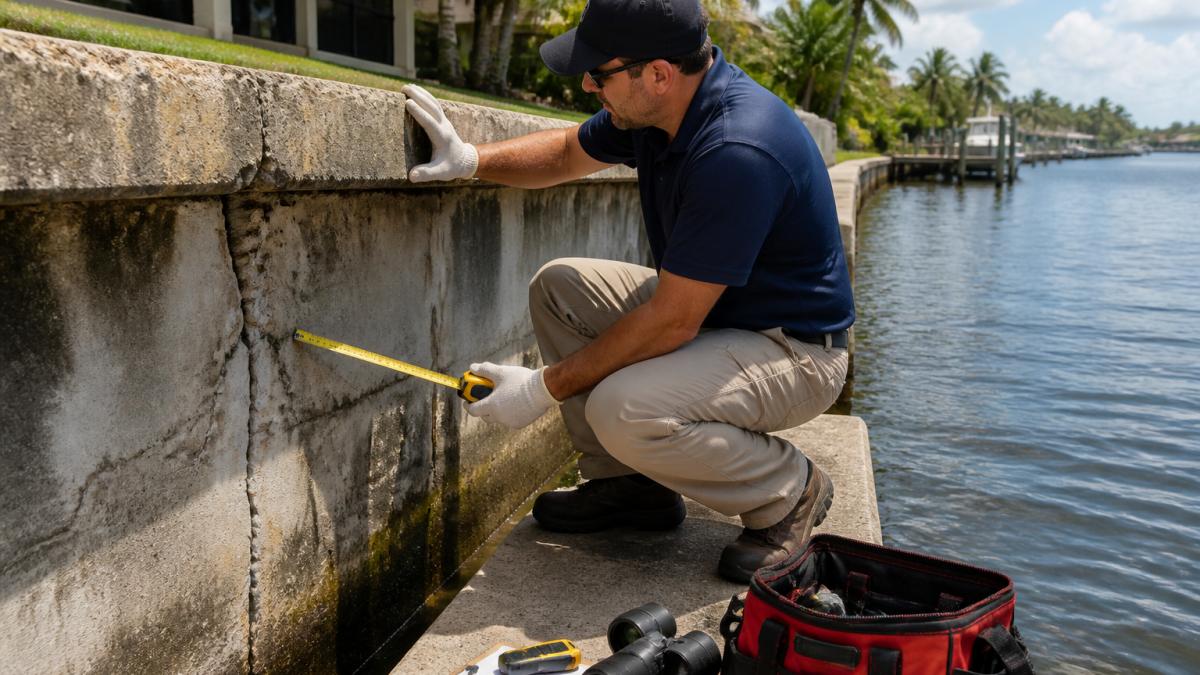
Before you start:
- Inspect during daylight when you can see clearly
- Wear sturdy shoes with good traction
- Avoid inspecting during storms or high tides
- Keep children and pets away from the water’s edge
- Have a camera or phone ready to document findings
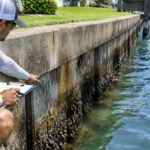
Step 1: Walk the full length of your seawall
Start at one end and walk slowly along the entire wall. Don’t rush. Look at the wall face from different distances and angles.
Step 2: Check for cracks and gaps
Run your hand along the wall surface. Feel for cracks, rough spots, or areas where concrete is missing. Look for:
- Horizontal cracks (most serious)
- Vertical cracks wider than 1/8 inch
- Gaps between the wall cap and the wall body
- Areas where concrete is spalling or crumbling
Step 3: Examine the wall cap
The wall cap is the top edge of your seawall. It takes the most weather exposure. Look for:
- Cracks running across the cap
- Pieces of concrete missing
- Gaps between cap sections
- Rust stains from rebar underneath
Step 4: Check for movement
Stand back and look at the wall’s overall shape. Is it straight and vertical? Or does it lean, bulge, or bow?
Step 5: Inspect the base and waterline
Walk to the water’s edge (if safe) and look at where the wall meets the water. Look for:
- Exposed soil or voids
- Erosion or undercutting at the base
- Rust stains or water seepage
- Debris or algae buildup
Step 6: Check the ground behind the wall
Walk along the back side of your seawall. Look for:
- Sinkholes or ground depressions
- Soft or spongy areas
- Standing water or wet spots
- Cracks in pavers or landscaping
Step 7: Document everything
Take photos of any problems you find. Measure cracks and note their location. Record the date and weather conditions.
Safety precautions and what not to do
Never climb on your seawall or stand on the wall cap. The concrete may be weak or unstable.
Don’t dig or probe behind the wall to check soil conditions. This can destabilize the wall further.
Avoid inspecting during or immediately after storms. The ground may be unstable and water levels unpredictable.
Don’t ignore obvious problems or wait for them to get worse. Small issues are cheaper and easier to fix than major failures.
Documenting findings and measuring severity
Take clear photos of any cracks, spalling, or movement. Include a ruler or coin in the photo for scale.
Note the location of problems. Is the damage at the top, middle, or base of the wall?
Record when problems appeared or changed. Did you notice cracks last month? Are they wider now?
Create a simple inspection log. Date each inspection and note what you observed. Over time, this log shows whether problems are stable or getting worse.
|
Inspection Element |
What to Look For |
Severity Level |
|---|---|---|
|
Cracks |
Horizontal, wider than 1/8″, growing |
High priority |
|
Spalling |
Exposed rebar, rust stains, chunks missing |
High priority |
|
Wall movement |
Lean, bulge, or bow from vertical |
High priority |
|
Soil loss |
Sinkholes, gaps, exposed foundations |
High priority |
|
Water seepage |
Active leaks, standing water, wet spots |
Medium priority |
|
Minor wear |
Hairline cracks, surface roughness |
Low priority |
Seawall Repair Options and When Professional Assessment Is Critical
Not every seawall problem requires immediate replacement. Some can be repaired. Others need urgent attention to prevent catastrophic failure. Knowing the difference saves time and money.
Distinguishing minor wear from structural failure
Minor wear includes hairline cracks, small areas of spalling, and light rust stains. These are cosmetic or very slow-progressing issues. They don’t threaten the wall’s ability to hold back water and soil.
Structural failure means the wall can no longer do its job. Signs include:
- Horizontal cracks or patterns of cracks
- Significant spalling with exposed rebar
- Visible lean, bulge, or bow
- Sinkholes or major soil loss
- Active water seepage or leaks
- Gaps forming between the wall and the ground
Structural problems demand professional attention. Repairs may range from targeted fixes to full replacement, depending on what’s causing the failure.
Urgency levels and next steps
Immediate attention (call within days):
- Horizontal cracks in the wall
- Sinkholes or large ground depressions
- Active water leaks through the wall
- Visible lean, bulge, or bow
- Exposed rebar with rust stains
Schedule within weeks:
- Moderate spalling (small areas of concrete missing)
- Gaps forming between wall cap and wall body
- Standing water behind the wall
- Soft or spongy ground near the wall
Plan for next season:
- Hairline cracks (monitor for growth)
- Minor surface deterioration
- Cosmetic rust stains
- Drainage issues that don’t cause standing water
When you’re unsure, call a professional. At Crocker Marine, we offer marine inspections that document your seawall’s condition and recommend next steps. A professional assessment costs far less than emergency repairs or replacement.
Your seawall protects your waterfront home and property value. Catching problems early keeps repair costs manageable and prevents the stress of sudden failure. If you’ve noticed any of the warning signs covered here, don’t wait.
Frequently Asked Questions
What are the most common signs of seawall structural failure?
The most recognizable signs of seawall structural failure include visible cracks (especially those wider than 1/8 inch), gaps between the wall cap and concrete, leaning or bulging wall sections, soil loss or sinkholes behind the wall, water seepage through the wall, and rust stains indicating internal corrosion. Often multiple signs appear together. A single small crack may be normal wear, but cracks combined with soil loss or wall movement indicate structural compromise requiring professional assessment.
How often should you inspect your seawall, and what should you look for during a seawall inspection?
Inspect your seawall at least twice per year—spring and fall—and after major storms. During a seawall inspection, check for new cracks or widening of existing ones, measure any wall lean or bulge, look for soil depressions or sinkholes behind the wall, note water seepage or standing water, and document rust stains or concrete spalling. Take photos and measurements to track changes over time. If you notice significant movement, new cracks wider than 1/4 inch, or soil loss, contact a professional immediately rather than waiting for the next scheduled inspection.
Can soil erosion behind a seawall be fixed, or does the entire wall need replacement?
Soil erosion behind seawall can sometimes be addressed through repair rather than full replacement, depending on severity and the underlying cause. Minor erosion may be corrected by improving drainage, adding backfill, or installing reinforcement. However, if soil erosion behind seawall has caused significant foundation instability, wall movement, or structural cracking, replacement may be necessary. A professional marine inspection is the only reliable way to determine whether repair or replacement is appropriate for your situation.
What should you do if you notice your seawall is leaning or bulging?
Leaning or bulging indicates active structural failure and requires immediate professional assessment. Do not delay or assume it will stabilize. Wall movement typically worsens over time due to continued soil pressure, water infiltration, and freeze-thaw cycles. Cordon off the area if possible to prevent people or property from being near the failing section. Contact a licensed marine contractor for an urgent inspection. The sooner you address the problem, the more repair options may be available before full replacement becomes necessary.